You've come to the right place if you want to check your website's PHP configuration, also known as phpinfo. Check, for example, whether your PHP configurations meet the requirements of any software you intend to run on your server.
This tutorial will show you how to create a phpinfo file as well as how to check its detailed information using the tools available in your hosting control panel. So, let's get started!
This post includes:
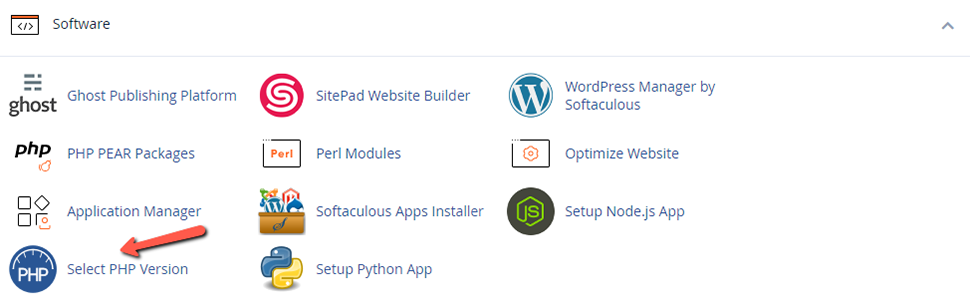
Checking PHP Information Using cPanel
You can easily check your PHP information using the Select PHP Version tool in cPanel:
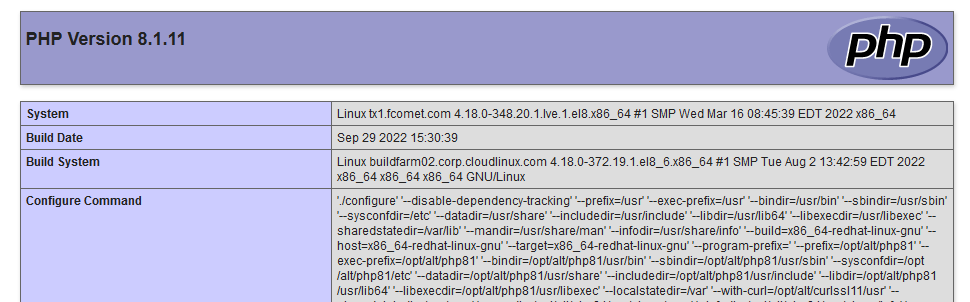
You will then be directed to a page that contains detailed information about your current PHP version, modules, values, and so on. Scroll down to find out more.
If you want to find information about a specific module or function, use the CTRL + F (CMD + F for macOS) shortcut to open your browser's search feature.
Checking PHP Information by Creating a phpinfo File
There is no need to be concerned if your hosting platform does not include the aforementioned built-in PHP Info feature. You can accomplish the same by including a phpinfo file in your public_html directory, or any directory that has a website in it. For the purposes of this guide, we will stick to public_html.
The file will be viewable through a browser and will contain the same detailed information.
You will require access to your public_html files. As an example, consider the cPanel File Manager.
- Navigate to File Manager under the Files section in your cPanel.
- Once you’re in the
public_htmldirectory, click the New File button. - Name your file
phpinfo.phpand press Create. - Scroll down and locate the new phpinfo file within the directory, then right-click to Edit.
- Copy and paste the following code into the text editor and press Save.
<?php
phpinfo();
?>
You can achieve the same result by using any text editor on your computer. Follow the same steps as before to create the phpinfo.php file, then upload it to your server's public_html folder using an FTP client.
Checking the phpinfo File Content
By now, you should have a phpinfo.php file in your public HTML directory. All that remains is for you to access the file by appending /phpinfo.php to the end of your domain name.
When you open the file in any browser, you should see something similar:
Note
If you don't want your phpinfo page to be displayed all the time, you can easily disable it by renaming the file phpinfo.php_disabled.
Conclusion
That's all there is to it! You've learned how to create a phpinfo.php file and how to check PHP information using your hosting control panel or your default browser by the end of this tutorial. That was pretty simple, wasn't it?
